We’ve all been there. That “Greatest Dad” decal, the vintage concert sticker, or that political slogan seemed like a brilliant idea three years ago. But time is rarely kind to adhesive vinyl. Now, you’re staring at a peeling, sun-faded eyesore that just doesn’t fit your style—or your car’s aesthetic—anymore.
The biggest hurdle isn’t just the sticker itself; it’s the Fear Factor. Every car owner has that nagging anxiety: “If I pull this off, am I going to take a chunk of my paint or clear coat with it?” On modern plastic bumpers, especially those on high-performance models, that fear is valid. Nobody wants to trade a $5 sticker for a $500 professional paint touch-up.
The good news? You don’t need a professional detailing kit or a trip to the body shop to fix this. In this guide, we’re going to show you exactly how to remove bumper stickers from car surfaces safely and efficiently. By using a few simple items you likely already have in your kitchen or garage—like a hairdryer and a bit of white vinegar—you can restore your bumper to its original, pristine condition.
Your Damage-Free Sticker Removal Toolkit
Before you start picking at that stubborn corner with your fingernails, let’s get organized. Removing a bumper sticker isn’t about brute force; it’s about chemistry and patience. If you rush the process, you risk leaving behind a “ghost” of adhesive or, worse, scarring your paint.
To learn how to remove bumper stickers from car surfaces like a pro, you need to gather a few household essentials. Here is your ultimate damage-free toolkit:
The Essential Toolkit
- A Heat Source (The Hairdryer): This is your most important tool. A standard hairdryer provides just enough heat to soften the adhesive without reaching the dangerous temperatures of an industrial heat gun, which can actually melt plastic bumper covers.
- The Lubricant/Solvent (WD-40, Goo Gone, or White Vinegar): You need something to break down the chemical bond of the glue. WD-40 is a fantastic “secret weapon” found in most garages, but dedicated citrus-based cleaners like Goo Gone also work wonders.
- A Plastic Card: Reach into your wallet for an old credit card, a library card, or even a plastic putty knife. This provides a firm, flat edge to lift the sticker without the sharpness of metal.
- Microfiber Towels: You’ll need these to wipe away residue and ensure you aren’t scratching the clear coat while you clean.
Pro Tip: The Golden Rule of Bumpers
If there is one thing you take away from this guide, let it be this: Never, under any circumstances, use a metal razor blade on a modern bumper.
Back in the day, when bumpers were made of heavy chrome-plated steel, you could scrape away with a razor without a care in the world. Today, however, almost every vehicle—from a standard commuter to a high-performance Mitsubishi Evolution—uses a flexible plastic bumper cover finished with a thin layer of paint and clear coat.
A metal blade will slice through that clear coat in a heartbeat, leaving a permanent gouge that no amount of wax can fix. By sticking to a plastic card and microfiber towels, you ensure that the only thing leaving your car is the sticker—not the paint.
The Heat Method: Softening the Bond
If you try to peel an old, sun-baked sticker off a cold bumper, you’re almost guaranteed a mess of torn paper and jagged plastic. The secret to a “one-pull” success story lies in temperature. Mastering how to remove bumper stickers from car surfaces starts with a humble household tool: the hairdryer.
The Technique: Slow and Steady Warmth
Start by cleaning the area around the sticker to remove any grit that could scratch your paint. Plug in your hairdryer and set it to “High.” Hold the dryer about 6 inches away from the sticker—never touch the nozzle directly to the car.
Focus your attention on the edges first. Move the dryer in a slow, circular motion for about 30 to 60 seconds. You’ll know it’s ready when the corners of the sticker start to look slightly “wet” or begin to lift on their own.
The Science: Why Heat Works
Most bumper stickers use a pressure-sensitive adhesive. Over time, this glue hardens and bonds to the clear coat of your car. By applying controlled heat, you are performing a bit of molecular chemistry. The heat increases the kinetic energy of the adhesive, causing it to transition from a hard, brittle state back into a soft, pliable liquid.
Crucially, using a hairdryer instead of an industrial heat gun is the safest choice for your vehicle. A hairdryer provides enough warmth to thin the glue but stays well below the temperature threshold that would cause your car’s clear coat to bubble or the plastic bumper to warp. It’s the perfect balance of effectiveness and safety, ensuring the only thing that moves is the sticker itself.
The “Slow & Steady” Peel: Precision Without the Pain
Once you’ve applied the right amount of heat, the real work begins. This is where most people get impatient and end up with a half-torn mess. Learning how to remove bumper stickers from car surfaces isn’t just about the tools you use; it’s about the technique of the “pull.” If you’ve ever tried to pull a price tag off a new gift only for it to shred into a thousand tiny pieces, you know exactly what we are trying to avoid here.
The Magic Angle: 45 Degrees
Timing is everything. While the sticker is still warm to the touch, start at one of the top corners. The secret to a clean removal is the angle of your pull. You want to peel the sticker back over itself at roughly a 45-degree angle.
Why 45 degrees? If you pull straight up (90 degrees), you’re putting maximum tension on the paper or vinyl, which often leads to it snapping or tearing. By pulling back and slightly to the side, you maintain a consistent tension that encourages the adhesive to release from the bumper rather than the sticker itself. If you feel the sticker getting “stiff” or resisting, stop immediately and reapply heat for another 30 seconds.
Using the Card: The Safe Lifter
Sometimes, those edges are just too stubborn for a fingernail. This is where your plastic credit card or library card becomes your best friend.
- The Approach: Gently slide the edge of the card under the heated corner of the sticker.
- The Motion: Use a light, side-to-side wiggling motion to break the initial seal.
- The Safety Factor: Unlike a metal blade, the plastic card will flex against the contours of your bumper. This allows you to get under the adhesive without digging into the delicate clear coat.
Think of the card as a wedge, not a scraper. Once you’ve lifted enough of the corner to get a firm grip with your fingers, put the card aside and go back to the 45-degree peel. By alternating between the card for the “lift” and your fingers for the “peel,” you’ll find that even the oldest, most sun-baked decals will eventually surrender.
Banishing the Ghost: Removing That Stubborn Adhesive Residue
You’ve successfully peeled back the vinyl, but now you’re left with a sticky, rectangular “ghost” haunting your bumper. This leftover residue is a magnet for road dust and grime, and if ignored, it will quickly turn into an ugly black smudge. Knowing how to remove bumper stickers from car surfaces isn’t complete until you’ve neutralized this remaining bond.
The “Goo” Problem
That tacky film is essentially the “skeleton” of the adhesive. Over years of exposure to heat and rain, the chemicals in the glue can harden into a resin-like substance. Don’t try to scrub this off with a dry cloth—you’ll likely just smear the goo and potentially create micro-scratches in your clear coat. Instead, you need a solvent to dissolve the bond.
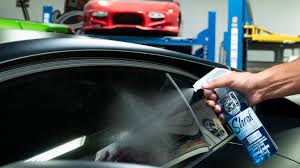
Safe Solvents for Your Bumper
You don’t need harsh industrial chemicals to get a clean finish. Several household items are remarkably effective and safe for automotive paint:
- WD-40: This is the gold standard for many detailers. The lubricants in WD-40 penetrate the adhesive and lift it away from the paint without damaging the finish.
- White Vinegar: A great eco-friendly option. Soak a paper towel in vinegar, press it against the residue for five minutes, and watch the “ghost” dissolve.
- Goo Gone: A citrus-based, dedicated adhesive remover that smells great and is specifically designed for these types of tasks.
Simply apply your chosen solvent to a microfiber cloth (avoid spraying directly onto the bumper to prevent run-off) and gently rub the area in circular motions until the surface feels smooth.
The Final Cleanse: Why Soap Matters
This is the most skipped, yet most vital step. Solvents are oily by nature. If you leave WD-40 or a citrus cleaner sitting on your bumper, it can attract dirt or, in extreme heat, potentially soften the paint over time.
Immediately after the residue is gone, grab a bucket of warm, soapy water and wash the area thoroughly. This neutralizes the chemicals and strips away any oily film, leaving your bumper truly clean.

Restoring the Shine: Protection and Perfection
Removing the sticker is only half the battle. Once the surface is smooth and clean, you’ll likely notice that the area where the sticker once sat looks a bit different from the rest of your bumper. This is the final stage of learning how to remove bumper stickers from car surfaces—the restoration.
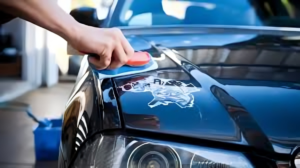
The Final Touch: Rewaxing
During the removal process, you used heat, plastic scrapers, and solvents like WD-40 or vinegar. While effective, these methods strip away any existing wax or sealant that was protecting your paint.
Applying a high-quality carnauba wax or a synthetic sealant is essential. This not only restores that showroom deep-gloss shine but also creates a fresh hydrophobic barrier. This layer will repel water, dirt, and new contaminants, making your bumper much easier to clean during your next wash.
Understanding “Ghosting” and UV Protection
If you remove a sticker that has been on your car for years, you might see a “ghost”—an outline where the paint under the sticker appears darker or more vibrant than the faded paint surrounding it.
This happens because the sticker acted as a shield against years of ultraviolet (UV) radiation. While the rest of your bumper’s clear coat has naturally oxidized and faded under the sun, the paint beneath the sticker remained perfectly preserved.
The Fix: A light polish or rubbing compound can help level the surrounding oxidation to match the “new” paint.
Prevention: Regular waxing acts like sunscreen for your car. By maintaining a consistent UV-protective layer, you ensure that the rest of your bumper ages at the same rate, preventing dramatic ghosting in the future.
Will removing a bumper sticker damage my car’s paint?
Not if you do it correctly! By using a heat source (like a hairdryer) to soften the adhesive and a plastic card instead of a metal blade, you can remove the sticker without harming the clear coat. Always avoid aggressive scrubbing and use safe solvents like WD-40 or Goo Gone.
What is the best household item to remove sticker residue?
White vinegar and WD-40 are two of the most effective household items for breaking down sticky “goo.” Simply soak a cloth in the liquid, hold it against the residue for a minute, and wipe it away.
Can I use a heat gun instead of a hairdryer?
While a heat gun works, it is much riskier. Heat guns can reach temperatures high enough to melt plastic bumper covers or cause the paint to bubble. For DIYers, a hairdryer is the safer, recommended choice for learning how to remove bumper stickers from car surfaces.
How do I fix the “shadow” left behind by an old sticker?
This “shadow” or “ghosting” occurs because the paint under the sticker hasn’t faded from UV exposure like the rest of the car. You can usually minimize this by using a light polishing compound on the surrounding area and applying a fresh coat of wax.
Can I use a razor blade on a glass window sticker?
Yes, a metal razor blade is generally safe for glass. However, never use a metal blade on the bumper itself, as modern bumpers are made of painted plastic that scratches easily.
Conclusion
At the end of the day, the secret to mastering how to remove bumper stickers from car surfaces isn’t found in a specialized chemical or a fancy tool—it’s patience. Taking the extra five minutes to heat the adhesive properly and peeling at a careful angle is the difference between a pristine finish and a permanent scratch.
By following this guide, you’ve saved yourself from the frustration of torn vinyl and sticky residue. You’ve treated your paint with the respect it deserves, ensuring your vehicle maintains its aesthetic appeal and resale value. Remember, a car without outdated stickers looks newer, cleaner, and ready for whatever its next chapter may be.