Changing car oil is one of the simplest ways to keep your engine healthy. In general, the process involves draining the old oil, replacing the oil filter, and refilling with the correct type and amount of fresh oil. Before you start, you’ll want to warm the engine slightly, lift the car safely, remove the drain plug, remove and replace the filter, and then refill, usually around 4–6 quarts, depending on your vehicle.
How to change engine oil in car step by step, with the key safety habits and tools you actually need, like a new oil filter, the right engine oil, a drain pan, a wrench, gloves, and safety glasses. I’ll also walk you through parts that many people miss, such as checking for leaks and ensuring the oil level is correct after refilling.
Ever since I’ve owned a car, I’ve always taken it to a quick lube to get the oil changed. Every 3,000 miles, I’d find myself sitting in a lounge munching on complimentary donuts while someone else handled the job. But once you understand the basic steps, switching to DIY can feel surprisingly manageable, and it puts you in control of what oil and filter your car actually receives.
Safety & Tools Checklist
1. Safety Precautions
Before you start the oil change, take a few moments to set up safely. This is what separates a smooth job from an accidental mess.
First, park on a level surface so the oil drains evenly, and the final dipstick reading is accurate. If your driveway or garage floor is sloped, you’ll likely end up with oil left behind or an overfilled engine.
Next, manage engine temperature: let the engine run for a short time so the oil flows better, but avoid working on a fully “hot” engine where exhaust components and hot oil can burn you. Good ventilation matters too, especially indoors, because you’ll be working near fumes and hot parts.
Finally, avoid spills and burns, wear gloves and ideally safety glasses; keep rags ready for drips; and never crawl under a vehicle that isn’t properly supported.
2. Tools & Supplies
Having the right items ready before loosening anything saves time and prevents frustration. You’ll need the correct engine oil (matching your vehicle’s required specification) and enough quantity to reach the proper level. Many cars are commonly in the 4–6 quart range, but always confirm your exact capacity.
For parts, prepare a new oil filter and a new drain plug washer/gasket if your car uses one (some drain plugs have reusable gaskets, but many do not).
For removal and tightening, gather a wrench/socket for the drain plug and an appropriate oil filter wrench if the filter is tight. Place an oil drain pan underneath to catch the old oil, and use a funnel to prevent spills when refilling.
For lifting, use jack stands or ramps, and for the procedure later, you can mention “no jack” options like ramps, but only if they’re suitable for your car’s clearance and your setup is stable.
Optional but helpful: rags for cleanup, brake cleaner for wiping residue around the drain plug or filter area, and a torque wrench for more accurate tightening.
3. Best Practice: Confirm Specs
To keep your DIY oil change accurate (and to support E-E-A-T by aligning with manufacturer guidance), confirm your specs before you buy oil and a filter.
Start with the owner’s manual, where you’ll find the exact oil viscosity, oil specification, engine oil capacity, and the correct filter part number.
Then cross-check using the dipstick plan: after refilling and a brief wait, verify the level on level ground and adjust only if needed. If your car has an oil life monitor, follow the manufacturer’s instructions to reset it after the change. This helps ensure the maintenance schedule matches real driving conditions.
How Many Kilometers Need to Change Engine Oil For A Car?
Engine oil change timing depends on intervals, the period (often based on mileage/kilometers and sometimes time) that the manufacturer recommends for your specific engine and oil type. The interval can vary because real-world driving is harder than “ideal” lab conditions. Your car may follow a manufacturer’s schedule (found in the owner’s manual), but driving conditions can shorten the interval.
How Many Kilometers Need to Change the Engine Oil in a Car?
A common rule you might hear is changing oil around every 5,000–8,000 km, but many modern vehicles use longer intervals (sometimes 10,000–15,000 km or even more) when you use the correct oil and meet normal driving conditions. Because these ranges differ by engine, oil grade/spec, and region, the safest answer is: follow your owner’s manual exactly.
What shortens the oil change interval?
Even if your car’s manual says longer, you may need to change sooner if you do:
- Frequent short trips (engine doesn’t fully warm up)
- Heavy city traffic and stop-and-go driving
- Extreme heat or cold climates
- Towing or carrying heavy loads
- Dusty roads or off-road/very dirty conditions
- Oil life monitoring systems
Some cars use an oil life monitor that estimates oil condition based on driving patterns. If your vehicle has this feature, rely on its indicator, still keeping in mind that severe driving may require earlier changes.
Step-by-Step: How to Change Engine Oil in a Car (10 Steps)
If you search for “10 steps to change engine oil”, you’re usually looking for a clear, safe, and repeatable DIY process. Below is a practical method that covers everything from warming up the engine to checking the dipstick afterward, so your car gets fresh oil and a correctly installed filter.
Before you begin, make sure you have the right oil specification and quantity, a new oil filter, and (if your car uses one) a new drain plug washer/gasket. Also, ensure the car is on level ground, and you’re using jack stands or ramps safely.
10-Step Oil Change Instructions
1. Raise the vehicle: Park on level ground, engage the parking brake, and lift the car using ramps or jack stands. Use stands for stability; never rely on the jack alone. If you’re using ramps, drive the car up fully and confirm it’s secure before going underneath.
2. Position the catch pan and remove the plug: Slide an oil drain pan under the drain plug area. Loosen and remove the drain plug carefully (oil may come out quickly). Keep your hands and face away from the stream to avoid burns or splashes. Let all oil drain completely.
3. Inspect the vehicle while all oil drains: While the oil is draining, visually inspect the drain plug threads, the oil pan area, and the filter region for leaks, damage, or residue. This is a good moment to wipe grime away so any new leak won’t be hidden later.
4. Reinstall the drain plug and torque: Once dripping slows to a stop, reinstall the drain plug. If your vehicle uses a new washer/gasket, install it. Tighten the plug to the manufacturer’s spec if you have a torque wrench; over-tightening can damage the threads, while under-tightening can cause leaks.
5. Remove old oil filter: Move the drain pan slightly so it’s under the filter area. Loosen the filter with an oil filter wrench if needed. Turn the filter by hand once it’s loose, and be prepared for leftover oil to spill. Remove it completely.
6. Clean mount and remove old O-ring: Wipe the filter mounting surface clean using a rag. Check that the old filter’s rubber O-ring is not stuck to the engine. If the old O-ring remains, it can cause leaks or prevent the new filter from sealing correctly.
7. Lube the new filter and attach it by hand: Lightly coat the new filter’s gasket/O-ring with fresh engine oil. Then install the filter by hand until the gasket contacts the mounting surface, and tighten according to the filter instructions (many specify an additional “turn” after gasket contact). Avoid using tools unless the manufacturer instructs it.
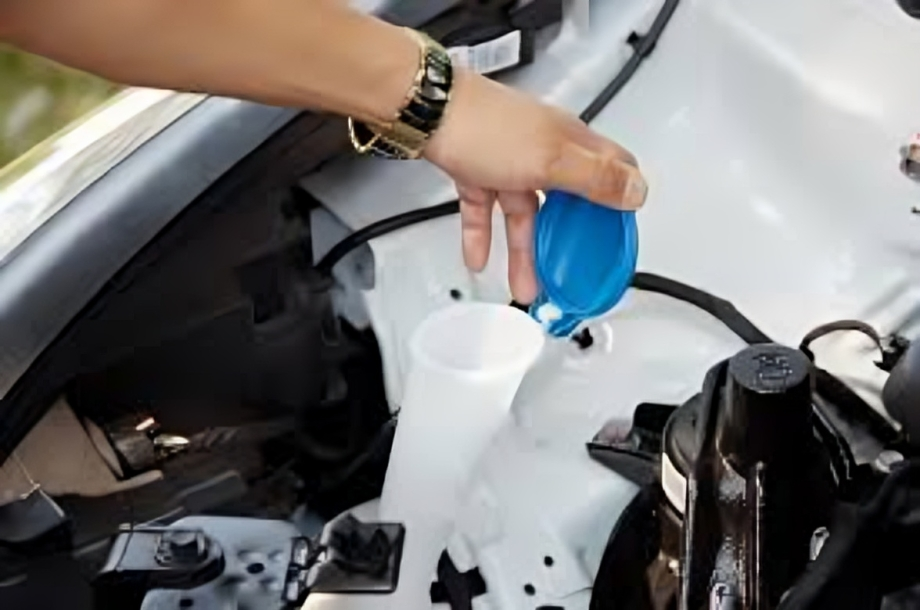
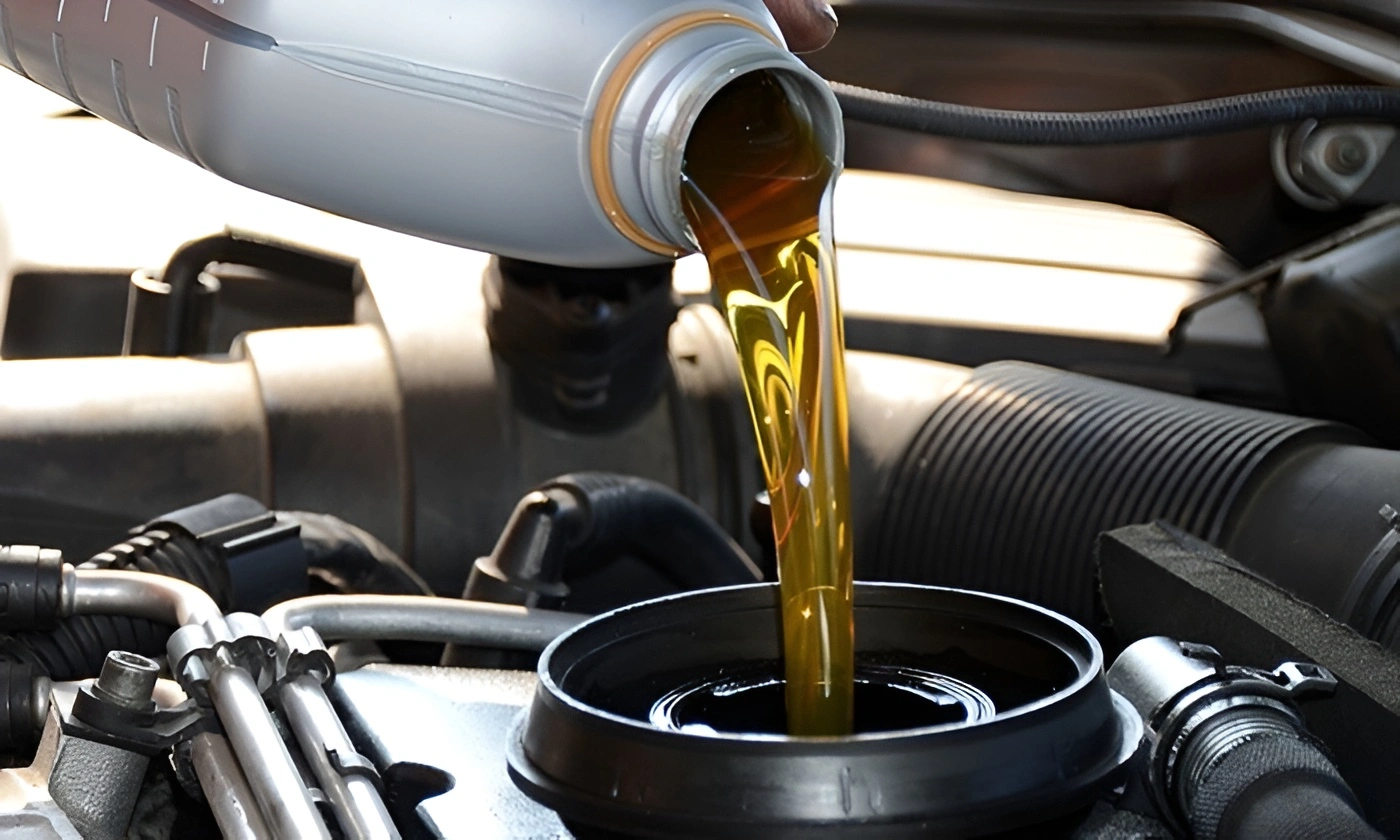
8. Remove oil fill cap and add new oil: Remove the oil fill cap. Pour in the new oil using a funnel to reduce mess. Add slightly less than the total capacity at first if you’re unsure, then plan to confirm using the dipstick after starting and settling.
9. Replace oil fill cap and start engine: Reinstall the oil fill cap securely. Start the engine and let it run for about 30–60 seconds. Watch the oil pressure light (if applicable) and check under the car for any immediate leaks around the drain plug and filter. Turn off the engine if you see leaking.
10. Stop engine, lower vehicle, and check dipstick level: Allow the oil to settle for a few minutes, then lower the vehicle. Check the dipstick, wipe it clean, reinsert it fully, and read the level. Add oil in small amounts until it reaches the proper mark. Confirm again for leaks and then reset the oil life monitor if your car has one.
How to change the oil filter in a car (detailed)

Signs the oil filter needs replacement
Your oil filter traps dirt and contaminants as the engine runs. Over time, it can become less effective, letting more debris circulate. Best practice: even if the filter still looks “fine,” replace it every time you change engine oil; that’s when you’re already draining and reopening the system, and it helps maintain consistent engine protection.
Where it’s located
In most cars, the filter sits in one of these areas:
- Near the engine block, accessible from the top/side
- Underbody, near the oil pan (needs a bit of crawling if clearance is low)
- In some designs, it may be inside an oil filter housing (spin-on canister vs cartridge style)
Always confirm the exact location using your owner’s manual so you don’t remove the wrong component.
How to remove it safely (without damaging parts)
Before removal, make sure the oil drain job is underway or completed so you can catch spills. Use an oil filter wrench if it’s tight. Turn counterclockwise, and once loose, keep turning by hand. Be careful not to puncture the filter, and make sure the old filter’s rubber O-ring didn’t stick to the mounting surface.
How to install the new filter
- Pre-fill: Only do this if your manufacturer recommends it (some engines benefit, others don’t).
- Lubricate the gasket: Coat the new filter gasket with a thin layer of clean engine oil for a better seal.
- Tighten correctly: Install by hand until the gasket contacts the surface, then tighten using the filter’s specified method (often “additional turns” rather than over-torquing). Over-tightening can cause leaks and make future removal harder.
How to change car oil without a jack
If you don’t have a jack, you still can change your car’s engine oil safely, as long as you can access the drain plug and oil filter with stable support. The goal is simple: secure the vehicle so it can’t roll or shift while you work underneath.
Safe alternatives
- Ramps: The most common option. Drive the car up fully onto approved ramps and confirm it’s stable before going underneath. Use wheel chocks if available.
- Drive-on platforms: Similar to ramps but usually sturdier and higher. Make sure the platform is rated for your vehicle weight and sits on solid, level ground.
- Specialized under-car stands: Some tools are designed to lift the front/rear with a platform-like setup. Only use stands that are meant for your car’s lift points and weight.
Safety reminders (must-follow)
Never rely on unstable methods like bricks, stacked wood, or makeshift supports. Always place the car on level, firm ground, engage the parking brake, and use wheel chocks. Work with good lighting and keep your head and hands out of pinch areas while positioning the drain pan and filter wrench.
Limitations to keep in mind
This approach may not work on cars with low ground clearance, sealed undertrays, or drain plugs that are too far under the chassis. Also, if your ramps/platform don’t give enough room to reach the filter safely, it’s better to use proper jack stands or a professional service instead.
How to change engine oil in a car at home
Changing engine oil at home is totally manageable if you follow a simple plan and use the correct tools and parts. With proper oil, a new filter, and a drain pan, you can do it safely and cleanly. Just work carefully and don’t rush.
Home setup (before you start)
- Choose workspace: A garage or flat driveway with good lighting. Park on level ground and apply the parking brake.
- Manage waste: Keep an oil drain pan ready. Use a funnel for pouring and keep a sealed container/bag for rags used to wipe spills.
- Cleanliness to avoid contamination: Wipe around the drain plug and filter area before removing. Keep dust away from the open oil fill opening, and cap it whenever you pause.
Post-job checklist (after you finish)
- Dipstick level correct: Wait a few minutes after refilling, check the dipstick, and top up only as needed to reach the proper mark.
- No leaks after running: Start the engine and let it run for 5–10 minutes. Inspect under the car near the drain plug and around the oil filter. Stop immediately if you see any dripping.
- Dispose properly: Don’t throw used oil or the filter in regular trash. Take used oil to a local recycling/auto parts collection center. Store the old filter and oily rags in a sealed bag/container until disposal.
Conclusion
You’ve now covered the full how to change engine oil in car journey: the 10-step process (from lifting the car to confirming the oil level), the KM interval concept (why oil changes depend on manufacturer guidance and real driving conditions), and the key oil filter replacement steps (signs it needs changing, safe removal, and correct installation). You also learned essential safety reminders (stability and correct setup) and the right disposal habits for used oil and the old filter.
FAQ
Can I change my engine oil myself?
Yes, you can change your engine oil yourself if you have the right tools (correct oil, new filter, drain pan, wrench, funnel) and follow safe lifting practices (ramps/jack stands). It’s important to use the manufacturer’s oil spec, tighten the drain plug correctly, and verify the oil level after running the engine.
What engine oil for Lexus?
How to change engine oil in car. The correct oil for a Lexus depends on your model, engine type, and whether you’re following conventional or synthetic requirements. Common viscosities you may see are 0W−20, 0W−30, or 5W−30, but don’t guess, check your owner’s manual or the label under the hood for the exact grade and API/ILSAC spec your car requires.
What oil does my Hyundai Tucson take?
Your Hyundai Tucson’s required oil grade and specification depend on the year and engine (for example, gasoline vs. turbo models). Many Tucson models commonly use 5W−20 or 0W−20, but confirm in your owner’s manual or on the oil cap. Use the required viscosity and API/SN or newer rating.
Can low oil cause stuttering?
How to change engine oil in car. Low engine oil can cause stuttering indirectly by starving critical moving parts, reducing pressure, and triggering warning lights or misfires due to engine performance issues. However, stuttering can also come from spark plugs, fuel, vacuum leaks, throttle issues, or transmission problems. If the oil is low, check immediately and refill to the correct level.
What are the signs that I need an oil change?
How to change engine oil in car. Common signs include the oil looking very dark or gritty, the engine running noisier than usual, the oil level dropping faster than expected, and the oil life monitor indicating it’s time. Also watch for the oil pressure warning light, a burning oil smell, or poor acceleration. Follow the mileage/time interval in your owner’s manual.