Can You Actually Paint Car Rims?
The short answer is yes — absolutely. Painting car rims is one of the most accessible and cost-effective ways to refresh your vehicle’s appearance without touching the bodywork. Whether your rims are looking faded, scratched, or you simply want a fresh color to match a new aesthetic, painting is a proven solution used by professional detailers and DIY enthusiasts alike.
However, can you paint car rims and “should you, the way you’re planning to” are two different questions. Painting rims is not like painting a wall in your living room. Rims endure extreme heat cycles from brake systems, constant road debris impact, UV exposure, and chemical contact from brake dust, road salts, and cleaning products. A paint job that doesn’t account for these conditions will peel, chip, or bubble within months.
Done correctly — with the right paint, proper preparation, and appropriate technique — painted rims can look stunning and last for years. Done poorly, they become an eyesore faster than unpainted rims ever would. This guide covers everything you need to know to get it right the first time.
Quick FactRim painting has surged in popularity as a modification option. Matte black, gloss white, and two-tone finishes are among the most searched rim aesthetics for Mitsubishi Lancer Evolution, Eclipse, and Outlander owners. A quality paint job can add $200–$800 to a vehicle’s perceived value at resale.
Types of Rim Paint — Which One Works?
Not all paints are created equal, and choosing the wrong product is the number-one mistake people make when painting rims. Here’s a breakdown of the main options available:
Spray Paint (Aerosol)
Standard aerosol spray paint is affordable and widely available, but it is rarely the right choice for rims unless it specifically states it is formulated for automotive wheels. Generic spray paint lacks the heat resistance and adhesion properties needed. However, automotive-specific aerosols — especially those combining primer, color, and a topcoat — can produce excellent results for a budget-conscious job.
Plasti-Dip (Rubber-Based Coating)
Plasti-Dip has become enormously popular for rims because it is peelable and reversible. It sprays on as a rubberized coating that, when applied in multiple layers, creates a durable, flexible shell over the rim. If you don’t like the result, you simply peel it off. It is not as glossy or as hard-wearing as traditional paint but is perfect for experimenting with colors and finishes.
Automotive Rim Paint
Purpose-formulated rim paint — often sold as a two-stage system with a primer and a top coat — is the gold standard for a lasting DIY finish. These products are engineered to handle the thermal stress that rims endure. Brands like VHT and Dupli-Color offer dedicated wheel coatings in a range of finishes, including matte, satin, and gloss.
Powder Coating
Powder coating is the professional-grade option. Rather than liquid paint, electrostatically charged powder is applied to the rim and then baked in an oven, creating an incredibly durable, even finish. It is not a DIY process — the rims need to be removed, stripped, and processed by a specialist. However, the results are superior to any spray-applied method in terms of longevity and finish quality. Powder coating typically lasts 5–10 years before showing meaningful wear.
| Paint Type | Durability | DIY Friendly? | Avg Cost (per set) | Reversible? |
|---|---|---|---|---|
| Generic Aerosol | Low | ✅ Yes | $20–$50 | ❌ No |
| Plasti-Dip | Medium | ✅ Yes | $40–$80 | ✅ Yes |
| Automotive Rim Paint | Good | ✅ Yes | $60–$150 | ❌ No |
| Powder Coating | Excellent | ❌ Pro only | $400–$800 | ❌ No |
Preparation: The Step Most People Skip
If there is one truth universally agreed upon by professional detailers, auto body technicians, and experienced modders, it is this: preparation determines 90% of the result. You can use the finest paint money can buy and still end up with a peeling, bubbling mess if the rim surface was not properly prepared before the first coat was applied.
Here is what thorough preparation looks like:
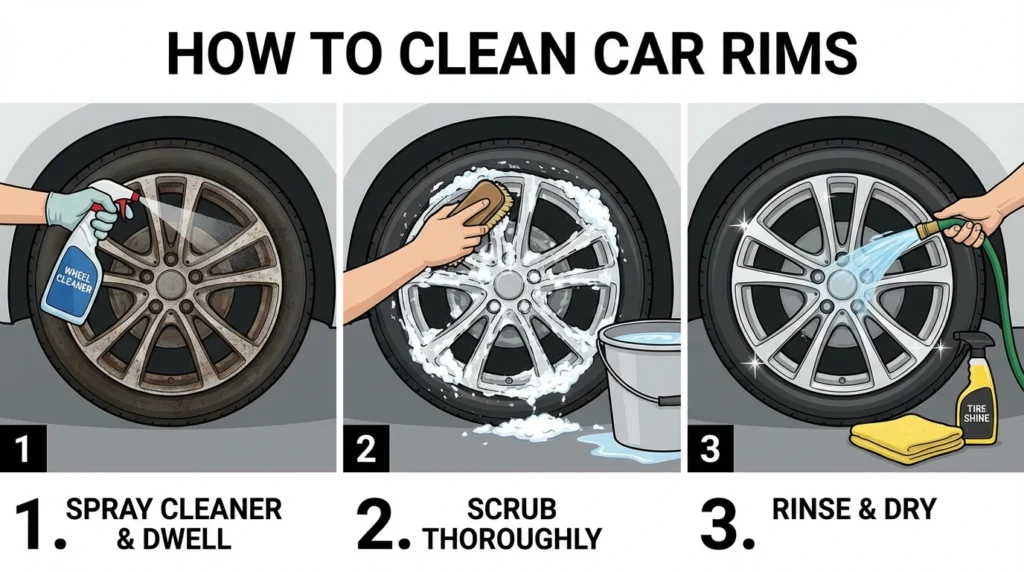
Clean aggressively. The rim needs to be completely free of brake dust, road grime, grease, wax, and any residue. Use a dedicated wheel cleaner — not a generic degreaser — and a stiff brush to scrub every crevice and spoke. Rinse thoroughly and allow to dry completely. Any contamination left on the surface will prevent adhesion.
Sand the surface. Use wet-and-dry sandpaper (typically 400-grit for initial sanding and 600-grit for finishing) to scuff the existing finish. This creates a mechanical bond for the new paint. Do not skip this step even if the rim looks smooth. Paint applied to a glass-smooth surface — especially a previously clear-coated one — will not bond properly.
Mask everything precisely. Use automotive masking tape and paper to cover the tire sidewall, the valve stem, and any brake components. A single overspray onto rubber or painted surfaces looks unprofessional and is difficult to correct.
Apply primer. Always apply a primer coat first, especially on bare metal. Etching primer is best for aluminum alloy rims (the most common material). It chemically bonds with the metal and gives the topcoat something to grip. Allow the primer to cure fully — typically 30 to 60 minutes — before moving to the color coats.
Pro Tip from Mitsubishi Autostore: If your rims are alloy — which most Mitsubishi Eclipse, Galant, Lancer Evolution, and Outlander factory wheels are — use a self-etching primer specifically for aluminum. Standard primers may adhere initially but will lift at the first heat cycle.
Step-by-Step: How to Paint Car Rims
Assuming you have properly prepared the rim surface, here is the complete process from first coat to final finish:
Remove or Mask the Rims
For the cleanest result, remove the rims entirely and work on them off the car. This gives access to the inner barrel, prevents masking errors, and allows you to hang the rim for even spray application. If you’re leaving them on, jack the car up, remove the wheel, and work on a clean surface.
Degrease and Wash
Wash the rim with dedicated wheel cleaner, working a stiff brush into all spokes and recesses. Follow with a panel wipe or isopropyl alcohol wipe-down to remove any remaining grease or wax residue. Allow to dry completely — at least 30 minutes in a warm, dry environment.
Sand the Surface
Starting with 400-grit wet-and-dry paper, scuff the entire face and barrel of the rim. Follow up with 600-grit for a smoother key. Wipe clean with a tack cloth or a damp microfiber to remove all sanding dust before proceeding.
Apply Self-Etching Primer (2–3 Coats)
Hold the can 10–12 inches from the surface and apply a thin, even first coat. Do not try to cover in one pass. Allow 10–15 minutes between coats. Two to three coats of primer is the minimum for solid adhesion. Let the final primer coat cure fully before painting.
Apply Color Coats (3–4 Coats)
Apply the rim paint in thin, overlapping passes. Avoid heavy coats that create runs. Three to four coats of color will give full, even coverage. Allow each coat to flash off — typically 10–20 minutes — before the next. Work in a warm, dry, dust-free environment if possible.
Apply Clear Coat (2–3 Coats)
A clear topcoat is essential for protecting the color layer from brake dust, UV, and road chemicals. Apply two to three thin coats, following the same technique as the color stage. Clear coat adds depth to the finish and dramatically extends the life of the paint job.
Cure and Re-mount
Allow a minimum of 24 hours before mounting the tire back onto the rim. Allow a full 72 hours before driving. The paint needs time to fully harden and cure — driving on freshly painted rims exposes them to stress before the coating is ready, causing premature chipping.
DIY vs. Professional: What Does It Cost?
$50
(aerosol, per set)
$150
(rim paint + clear)
$600
powder coat (set)
The cost difference between DIY and professional rim painting is significant, but so is the result gap. A budget DIY job can look surprisingly good if done carefully — but it typically lasts one to two years before needing attention. Professional powder coating, by contrast, can last the life of the rim under normal conditions.
Beyond aesthetics, there are other considerations. When rims are sent for professional refinishing, they need to be balanced again afterward, which adds to the cost. And if there are pre-existing structural issues — cracks, severe curb rash that has gone deep into the metal, or bent flanges — no amount of paint will fix those problems. In those cases, the honest conversation shifts from paint to replacement.
5 Common Mistakes That Ruin the Job
Skipping the Primer
This is the most common error. Paint applied directly to a bare or previously-coated rim without primer will delaminate — often within weeks. Self-etching primer is not optional; it is the foundation on which everything else depends.
Painting in Cold or Humid Conditions
Paint applied below 50°F or in high humidity will not cure correctly. The result is a chalky, uneven finish that chips easily. Always work in a dry environment between 65°F and 85°F for best results.
Applying Coats That Are Too Thick
Runs and sags in paint are caused by applying too much product in a single pass. Multiple thin coats always outperform fewer heavy ones. If you see a run developing, do not try to wipe it — let it dry and then sand it flat.
Not Allowing Proper Cure Time
Mounting tires or driving on freshly painted rims before the paint has cured causes chipping and peeling at the bead area, which is also the highest stress zone. Patience here pays dividends in longevity.
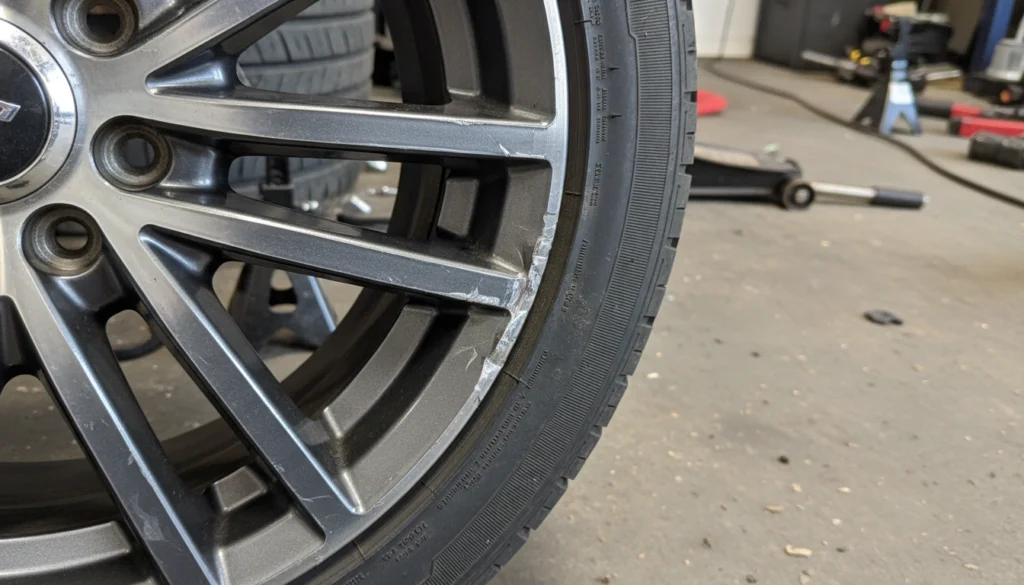
Painting Over Damage Rather Than Fixing It
Paint will not fill in curb rash or hide deep scratches — it will actually highlight them once the light hits the finished rim at an angle. Fill and sand any significant surface damage before priming. For anything more than a minor cosmetic rash, consider whether a replacement rim is a better investment.
When Painting Isn’t Enough: Time to Upgrade
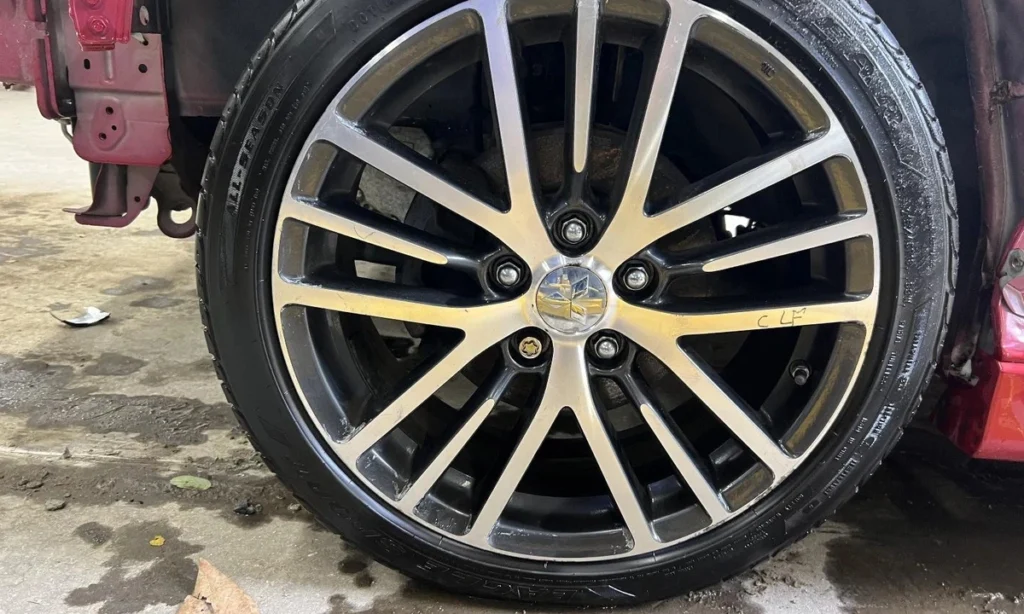
Painting your rims makes sense when the underlying structure is sound, the rim is the correct size and fitment for your vehicle, and you simply want a refreshed look. But there are situations where the honest answer is that paint is not the right solution.
If your rims show any of the following, replacement is the smarter call:
- Cracks in the spoke or barrel — structurally compromised rims are a safety hazard, full stop.
- Severe curb rash that has gouged into the metal deeper than the surface level.
- A bent flange that causes a persistent tire bead leak or vibration.
- Corrosion that has eaten through the coating into the alloy substrate.
- Rims that are mismatched in style, incorrect bolt pattern, or the wrong offset for your suspension setup.
For Mitsubishi owners specifically — whether you drive an Outlander, a Galant, a Lancer Evolution, or an Eclipse — upgrading to a set of purpose-matched performance rims rather than painting worn-out OEM units is an upgrade that pays off in both aesthetics and function. The right rim, with the correct offset and load rating, improves handling, reduces unsprung weight, and completes the visual impact of the vehicle in a way that a paint job alone cannot.
Mitsubishi Autostore Recommendation
At Mitsubishi Autostore, we carry a curated selection of performance rims specifically matched to Mitsubishi vehicle specifications — from the Eclipse to the Lancer Evolution X. Our inventory is quality-checked for fitment, and we offer real-time shipping tracking so you know exactly when your upgrade arrives. If you’re on the fence between painting and replacing, our support team can walk you through the options for your exact model.